Business Central and Dataverse - Synchronising Choice fields
- adrogin
- Oct 28, 2023
- 4 min read
This post continues the topic which I started in the previous text (you can read the earlier post here) - integration between Business Central and Dataverse, possible synchronisation problems, and their solutions. This time, I want to focus on the mapping between the Dataverse Choice type and its BC counterpart - Enum.
Continuing my demo, I will add a Choice field to the Product Certificate table in Dataverse and will walk through the synchronisation of this field with a respective field in the Business Central's Item Certificate table. And like the previous time, first I'm going to show the wrong way of doing this - which seems easier in the beginning, but will definitely cause more problems down the road. In this scenario, I'm going to add a Choice field to my Product Certificate table which is synchronised with Business Central's Item Certificate.
The wrong way of creating the field is the one that looks most obvious at first glance: just select Tables in the navigation panel, find the Product Certificate table and add the new column.

This is what we should avoid doing, and now I'm going to demonstrate the problem it can cause.
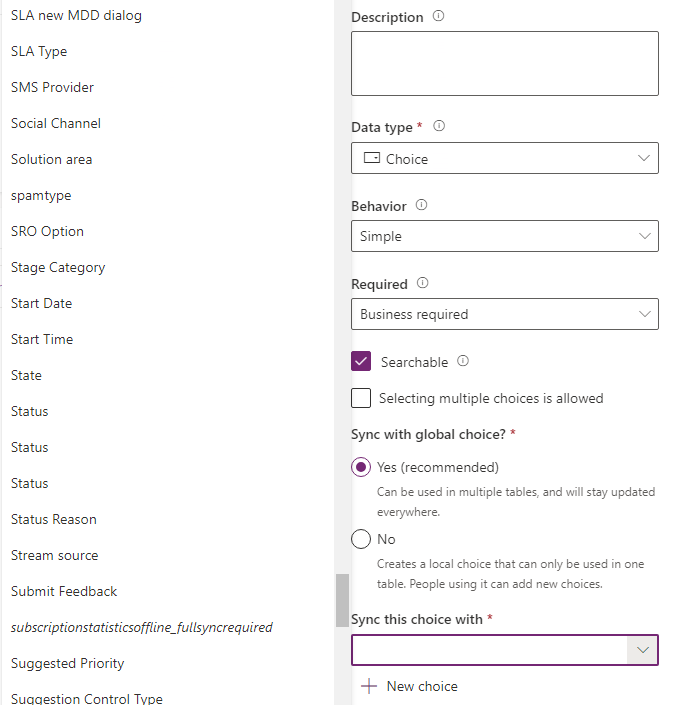
The field that I want to add is Certificate Status which will show the certificate validity state. In the new column setup, I fill in the column name, select the data type (it will be Choice), and change the Required property from the default Optional to Business Required.

The last piece of configuration required for the field is the choice of the Choice. I mean, assigning the Choice options to the field. We can make it local in the table or synchronise with a global Choice object. BC developers will find it very similar to Option fields (local choice) and Enums (global choice). Let's select the global (recommended) option and click on the New choice action to declare the new choice type.
Here, we need to define the name for the new type, labels and numeric values for each choice item. Values are suggested automatically, so we only need to enter the labels.

Once the Dataverse field is set up, we need to reflect the changes in BC. Create a new Enum with value IDs matching those of the Dataverse choice. Captions and literal values are not relevant for the synchronisation, although it is good to give them the same names for the sake of readability.
enum 50900 "Product Certification Status"
{
    value(330040000; Active)
    {
        Caption = 'Active';
    }
    value(330040001; Expired)
    {
        Caption = 'Expired';
    }
    value(330040002; Revoked)
    {
        Caption = 'Revoked';
    }
    value(330040003; "Pending Renewal")
    {
        Caption = 'Pending Renewal';
    }
}
I will skip the nuances of the AL integration code, but if you are interested to explore the details, you can find the source code for both BC and CE solutions in my GitHub repository.
Once all the code is completed and published on the dev sandbox, I can run the integration job queue and observe the result. All the certificates now have their status properly displayed in the page. Nicely done!

All dev integration testing is done, and now it's time to deploy the BC extension to the client's UAT instance where the Dataverse solution is already deployed. I install the solution, enable the integration job, and see a very different result. Instead of certificate statuses seen in the previous run, now the status field shows 0 for each record.

The problem, just like the one I showed in the previous post, is the table edited outside of a solution. Each choice value in Dataverse is a combination of a prefix and an incremental part: 330,040,001
Red digits here are the prefix, and the purple part is the increment. Like the object prefix, the choice value prefix is specific to the solution publisher, and any Dataverse modifications made outside of an explicitly specified solution, are associated with the default solution (and the default publisher) in the environment. Every environment has its own default publisher and the default solution with specific prefixes, therefore choice fields created in different environments will have different numeric values. Unlike object name prefixes, choice values can be modified manually, but once again, the proper way of handling numeric values in choice fields is to do all modifications in a solution that can be redeployed on multiple environments.
To include my changes in the solution which I already have in my environment, I choose Solutions in the navigation pane and find the Product Certification solution. In this view, I choose Objects where I can modify my custom table and create a Choice object.

My solution is linked to the publisher named Cronus, and I want to make sure that choice prefix for this publisher is aligned with the prefix in the target environment.
October 2023 update removed the Publishers view from the Solutions area. Now, to find the publishers, users of the Power Apps portal have to navigate to the More section in the navigation pane and then use the Discover All function.

Scroll down to the bottom of the page and there you will find publishers. In this view, you can pin the publishers button to the home page. Or just open the publishers view from this page.
Locate the Cronus Inc. publisher and edit the Choice value prefix field, so that the prefix matches the respective value in the solution deployed on the target environment.

With this configuration, every choice object created in the solution will be prefixed with the given number. This method is a more reliable way of declaring Dataverse choices and redeploying the schema and code across environments.
Comments